Early in my WordPress optimization career, a client complained that their site was still slow despite
installing “the best caching plugin.” When I investigated, I found the plugin was configured but the
cache wasn’t actually being served to visitors—a common misconfiguration that left page generation
times unchanged. The plugin was creating cached files, but nothing was reading them.
That experience taught me something fundamental: caching isn’t a single thing you turn on. It’s
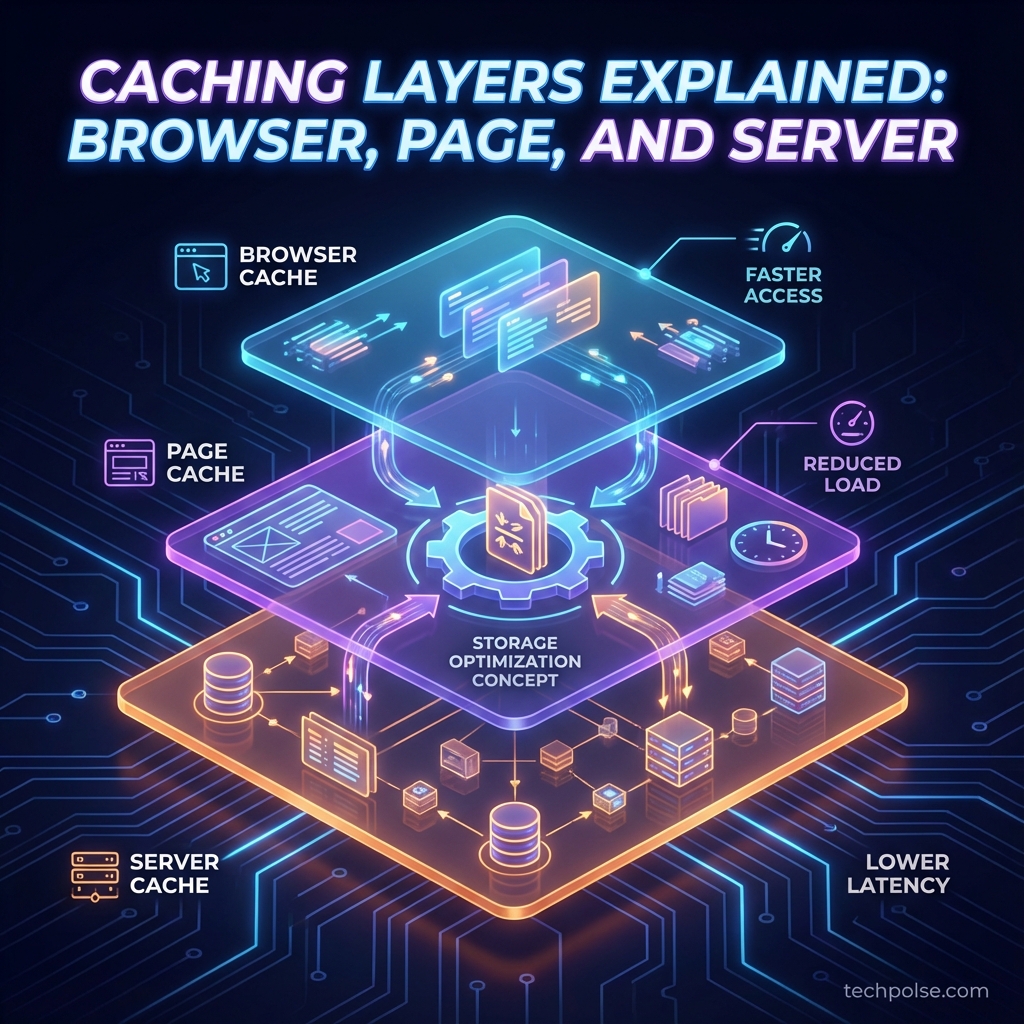
multiple complementary systems working at different layers, each solving different problems.
Understanding these layers—what each does, when each applies, and how they interact—is essential for
effective performance optimization. Without that understanding, you might install caching tools that
conflict with each other, or troubleshoot the wrong layer when things go wrong, or miss
opportunities for significant speed improvements.
After optimizing hundreds of WordPress sites, I’ve developed a clear mental model of how caching
layers work together. This guide explains that model: browser caching, page caching, object caching,
and CDN caching. You’ll understand what each layer does, when it helps, how to configure it
properly, and how to troubleshoot when cached content doesn’t update as expected.
Understanding the Caching Problem
Before diving into specific cache types, let’s establish why caching matters so much for WordPress
specifically and what problems each caching layer solves.
Why WordPress Needs Caching
WordPress is a dynamic content management system. When someone visits a page, WordPress typically has
to execute PHP code that queries a MySQL database multiple times, assembles content from various
sources, applies themes and plugins, and finally generates the HTML that gets sent to the browser.
This process can involve hundreds of database queries and significant server processing time on a
typical WordPress page.
For a simple blog post, this might take 200-500 milliseconds on decent hosting. For a complex page
with many plugins, widgets, and dynamic elements, it might take 1-2 seconds or more. And this
happens for every single visitor, every single time they load a page. If you have 100 visitors
viewing a page simultaneously, your server runs that entire generation process 100 times, consuming
substantial CPU and memory resources.
Caching addresses this by storing results so they can be reused without regenerating. Instead of
running all that PHP and querying the database every time, a cached response can be served almost
instantly with minimal server resources.
The Multiple Layers Logic
Why multiple caching layers instead of one? Because different layers solve different problems at
different points in the request lifecycle.
Browser caching prevents the browser from requesting resources it already has—no network request is
made at all. This is the fastest possible cache hit because there’s no network latency involved.
CDN caching moves content closer to visitors geographically. A visitor in Australia accessing a site
hosted in Germany can get cached content from an Australian CDN edge server instead of waiting for
the round-trip to Germany.
Page caching stores complete HTML pages so WordPress doesn’t need to run at all for most visitors.
The web server can return a static file almost instantly.
Object caching stores database query results in memory so that when WordPress does need to run, it
can skip expensive database queries and use cached results instead.
Each layer catches requests that the previous layer missed, and together they create a
defense-in-depth that maximizes performance while minimizing server load.
Browser Caching: The First Line of Defense
Browser caching happens on the visitor’s own device. When configured properly, browsers store copies
of resources locally and use those copies on subsequent page loads instead of downloading again.
This is the fastest type of caching because there’s no network request at all.
What Gets Browser Cached
Browsers primarily cache static assets: CSS stylesheets, JavaScript files, images, fonts, and other
resources that don’t change between requests. These files often represent the majority of bytes
transferred on modern pages. A typical blog post page might have 300KB of HTML but 2MB of images,
CSS, and JavaScript. Caching those 2MB of assets on first visit means subsequent page views only
need to request the 300KB HTML.
HTML pages themselves can be browser-cached, but this requires care. If you cache HTML too
aggressively, visitors might not see content updates when you publish changes. Most sites use short
or no browser caching for HTML while using long caching for static assets.
Cache-Control Headers
Browser caching is controlled by HTTP headers sent with responses. The primary header is
Cache-Control, which accepts various directives telling browsers how to handle caching.
The max-age directive specifies how long (in seconds) a resource should be cached. Cache-Control:
max-age=31536000 tells browsers to cache the resource for one year—about as long as you’d ever want.
Shorter durations like max-age=3600 (one hour) or max-age=86400 (one day) are appropriate for
content that changes more frequently.
The immutable directive tells browsers that the resource will never change while its cache is valid.
This prevents browsers from making conditional requests to check if the resource has changed. For
versioned assets (where the filename changes when the content changes), immutable improves
performance.
The no-cache directive sounds like it prevents caching, but it actually means “cache the response,
but always validate before using.” The browser stores the cached copy but checks with the server
before using it. This is useful for content that changes unpredictably.
The no-store directive actually prevents caching entirely. The browser doesn’t store the response at
all. Use this for sensitive content that shouldn’t be stored on disk.
Optimal Browser Cache Configuration
For WordPress sites, I recommend the following browser cache durations based on file types:
CSS and JavaScript files should be cached for one year with the immutable flag, assuming you use
versioned filenames (either through query strings like style.css?ver=2.0 or fingerprinted names like
style.a1b2c3.css). When the file changes, the URL changes, so the long cache time doesn’t prevent
updates. WordPress core handles version strings automatically for enqueued scripts and styles.
Images should similarly be cached for one year. Once you upload an image, it typically doesn’t
change. If you need to update an image, you’d generally upload a new file rather than modifying the
existing one.
Fonts can be cached for one year. Font files virtually never change.
HTML pages should either not be cached at all (Cache-Control: no-cache) or cached very briefly
(max-age=300 for 5 minutes). Visitors should see current content, and with page caching on the
server side, HTML delivery is already fast.
Configuring Browser Caching
Browser cache headers are configured at the server level. For Apache, you’d use mod_expires or
mod_headers in .htaccess. For Nginx, you’d use the expires directive in your server configuration.
Many WordPress caching plugins include browser caching configuration. WP Rocket, W3 Total Cache, and
similar plugins can add the appropriate rules to your .htaccess or provide recommendations for
Nginx. This is often the easiest approach if you’re not comfortable editing server configuration
directly.
CDNs like Cloudflare also apply browser caching rules. If you’re using a CDN, verify that browser
caching is configured there as well as on your origin server, and that the configurations don’t
conflict.
Page Caching: Bypassing WordPress
Page caching stores the complete HTML output of pages so that subsequent requests don’t need to run
WordPress at all. Instead of executing PHP, querying databases, and generating pages dynamically,
the web server simply returns a pre-generated HTML file. This is enormously faster—response times
drop from hundreds or thousands of milliseconds to single-digit milliseconds.
How Page Caching Works
The first time someone visits a page, WordPress generates it normally. Once generation is complete,
the caching system stores the HTML output—either as a static file on disk or in memory.
When the next visitor requests the same page, the caching system intercepts the request before
WordPress loads. It checks if a valid cached version exists. If so, it returns the cached HTML
immediately. WordPress never loads, PHP never executes, the database is never queried.
The performance impact is dramatic. A WordPress page that takes 500ms to generate might be served
from cache in 10ms. Server load drops proportionally—a server that could handle 50 concurrent
visitors running WordPress might handle 500+ serving cached pages.
Plugin-Based vs. Server-Level Caching
Page caching can happen at two levels: within WordPress via plugins, or at the server level before
PHP loads.
Plugin-based caching (WP Super Cache, W3 Total Cache, WP Rocket) works on any hosting environment but
requires PHP to load minimally to check cache status. The plugin creates static HTML files and
includes early-execution code that checks for cached versions before WordPress fully loads. This
approach is portable and flexible but not quite as fast as server-level caching.
Server-level caching (Nginx FastCGI cache, LiteSpeed Cache, Varnish) happens at the web server level
before PHP ever loads. The web server itself handles cache checking and serving. This is faster than
plugin-based caching but requires specific server configuration and may be unavailable on shared
hosting.
Many managed WordPress hosts (Kinsta, WP Engine, Cloudways) provide server-level caching as part of
their hosting. If your host offers this, use it—it’s typically faster and more reliable than plugin
solutions. If you’re on shared hosting without server-level options, plugin caching is the way to
go.
What Gets Page Cached
Page caching typically applies to anonymous visitors—people who aren’t logged in and don’t have
identifying cookies. For these visitors, pages can be safely cached because everyone sees the same
content.
Logged-in users present a challenge because they often see personalized content: their username in
the header, admin bars, edit links, and potentially customized content. Most caching solutions
exclude logged-in users from page caching, meaning they experience slower page loads but see
personalized content correctly.
Certain pages are typically excluded from caching: the WordPress admin area, checkout and cart pages
on e-commerce sites, pages with contact forms (to avoid CSRF token issues), search results pages
(infinite URL variations), and any page that displays user-specific content.
Cache Invalidation
Cached content becomes stale when the underlying content changes. Cache invalidation—deciding when to
discard cached versions—is one of the trickier aspects of caching.
Time-based expiration is the simplest approach: cache expires after a fixed period (say, 24 hours)
regardless of whether content changed. This is simple and reliable but means visitors might see
outdated content until the cache expires. For blogs that don’t update frequently, this is often
fine. For news sites, it’s problematic.
Event-based purging clears cache when content changes. When you publish or update a post, the caching
system purges the cached version of that post. Most caching plugins support this automatically,
hooking into WordPress’s save_post and related actions to trigger purges.
Smart purging goes further, clearing not just the changed page but related pages: the homepage (which
might list the post), category archives, author archives, and sitewide elements that might contain
the post. This ensures consistency but increases the scope of cache invalidation.
Manual purging is sometimes necessary when automatic purging misses something or when you’ve made
changes that should affect cached content. Most caching plugins provide admin buttons to clear all
cache or specific URLs.
Object Caching: Speeding Up WordPress Itself
Object caching stores database query results and computed values in memory. Unlike page caching
(which bypasses WordPress entirely), object caching speeds up WordPress when it does need to run—for
logged-in users, admin pages, and any requests that bypass page cache.
How WordPress Uses Object Cache
WordPress has a built-in object cache API. When enabled, WordPress core and plugins can store and
retrieve data through this API. Common uses include caching database queries (so repeated queries
return cached results), caching computed values (so expensive calculations don’t repeat), and
storing transients (temporary data with expiration).
By default, WordPress’s object cache only persists for the current request—it’s not actually cached
between requests. This default behavior provides some optimization within a single page load but
doesn’t help subsequent requests.
Persistent Object Cache with Redis or Memcached
The real benefit comes from persistent object cache using an in-memory data store like Redis or
Memcached. These systems store data in RAM, persist it between requests, and return it extremely
fast—typically in under a millisecond.
When you install Redis or Memcached and connect WordPress to it via an object cache plugin,
WordPress’s object cache API starts using the persistent store. Database queries that would take
5-50ms now return cached results in under 1ms. For a page that makes 100+ database queries, the
cumulative savings are substantial.
Redis is generally my recommendation over Memcached. Redis offers more features (data persistence,
complex data structures, replication), while Memcached is simpler and slightly faster for basic
key-value storage. For most WordPress sites, Redis’s additional features are worth the marginal
performance difference.
When Object Cache Helps Most
Object cache provides the biggest benefits when page caching doesn’t apply. This includes logged-in
user experiences (page cache typically excluded), the WordPress admin dashboard (never page cached),
WooCommerce cart and checkout (often excluded from page cache), membership sites with personalized
content, and any dynamic functionality that can’t be page cached.
For simple blogs where most visitors are anonymous and page cache covers nearly all requests, object
cache provides smaller benefits. But even then, it speeds up the admin experience and handles the
minority of requests that bypass page cache.
For complex sites with many logged-in users, e-commerce functionality, or heavy plugin usage
generating many database queries, object cache can be transformative. I’ve seen admin dashboard page
loads drop from 8 seconds to under 2 seconds just by adding Redis object cache.
Object Cache Configuration
Setting up object cache requires both the cache service (Redis or Memcached) and a WordPress plugin
to connect to it.
On managed WordPress hosting, Redis is often available and may be pre-configured. Check your host’s
documentation. On VPS or dedicated servers, you’ll need to install Redis yourself (a straightforward
process on most Linux distributions) and then install a plugin like Redis Object Cache or WP Redis.
Configuration is usually minimal: install the service, install the plugin, and verify it’s working.
The plugin handles the connection and makes WordPress use the persistent cache automatically.
CDN Caching: Geographic Distribution
Content Delivery Networks maintain cache servers at edge locations around the world. Instead of all
visitors connecting to your origin server (wherever it’s located), visitors connect to the nearest
CDN edge server, which caches and serves content locally.
What CDNs Cache
All CDNs cache static assets: images, CSS, JavaScript, fonts, and other files. When a visitor in
Australia requests an image, the CDN serves it from an Australian edge server rather than fetching
it from your origin server in the US or Europe. This reduces latency significantly—from potentially
hundreds of milliseconds for cross-ocean requests to tens of milliseconds for local delivery.
Many CDNs also support full page caching at the edge. Services like Cloudflare APO cache your entire
HTML pages at edge servers, meaning the page itself is served from the nearest location. This
combines the benefits of page caching with geographic distribution, providing extremely fast
experiences for visitors anywhere in the world.
CDN Cache Headers and TTL
CDNs generally respect the Cache-Control headers from your origin server. If your server says
max-age=86400, the CDN caches for 24 hours. This means getting your origin cache headers right
applies to CDN behavior as well.
CDNs also provide their own cache controls that can override origin headers. Cloudflare’s page rules,
for example, can force specific URLs to cache at the edge regardless of origin headers. This is
useful for forcing edge caching of HTML pages or for overriding overly aggressive no-cache headers
from plugins.
When configuring CDN cache settings, ensure TTLs are consistent with your origin cache settings and
your content update frequency. Longer TTLs mean fewer requests to your origin (lower server load)
but slower propagation of content updates.
CDN Cache Purging
When content changes, you need to purge the CDN cache so visitors see updates. CDN caches are
distributed globally, with copies at dozens or hundreds of edge locations. Purging might take
seconds to minutes to propagate everywhere.
Most CDNs provide purge APIs that can be triggered automatically. Cloudflare’s plugin for WordPress,
for example, purges relevant URLs automatically when posts are updated. Similar integrations exist
for most major CDNs.
If automatic purging isn’t working correctly, CDN dashboards typically provide manual purge
options—for specific URLs or for the entire cache. Use development mode or bypass cache (usually by
adding a query string) when testing changes.
CDN Integration Considerations
CDN integration involves DNS changes: your domain points to the CDN instead of directly to your
server. The CDN then fetches content from your origin server and caches it. This is typically a
straightforward setup, but it means your CDN is now between visitors and your server, affecting how
things like IP addresses, SSL certificates, and redirects work.
Verify that your caching plugins and CDN work together rather than conflicting. Some combinations can
create problems—double caching, conflicting headers, or failed purge notifications. Test thoroughly
after setup.
How the Layers Interact
Understanding how cache layers interact helps with both optimization and troubleshooting. Let’s trace
a request through all layers to see how they work together.
The Complete Request Flow
A visitor requests a page. First, the browser checks its local cache. If a valid cached version
exists without needing validation, no network request is made—this is the fastest possible result.
If the browser has an expired cached version or needs to validate, it makes a request.
That request goes to the CDN edge server nearest the visitor. The CDN checks its cache. If it has a
valid cached version, it returns it immediately—the request never reaches your origin server. This
is extremely fast because the edge server is geographically close.
If the CDN cache misses, the request reaches your origin server. If you have server-level page
caching (Nginx FastCGI, Varnish), it checks for a cached HTML file. If found, the cached HTML is
returned without loading PHP or WordPress.
If server-level page cache doesn’t exist, your caching plugin (if you have one) checks for a cached
version. This requires loading minimal PHP but avoids full WordPress initialization if cache is
found.
If no page cache exists, WordPress loads fully and begins generating the page. As it queries the
database, the object cache (if configured) returns cached query results instead of hitting the
database. This speeds up the generation process.
Finally, the generated HTML is returned, and at each layer, appropriate caching might occur: the page
cache stores the HTML, the CDN caches for edge distribution, and the browser caches for future
visits.
Common Interaction Problems
Multiple cache layers can create confusion when they’re not coordinated.
Content not updating after changes is the most common complaint. You publish a post update, but
visitors still see the old version. The problem is that old versions exist in one or more caches. To
resolve, purge from inside out: first page cache, then CDN cache, then verify browser cache isn’t
the issue (test in incognito). With proper purge automation, this should be rare.
Conflicting cache TTLs cause unpredictable behavior. If your page cache expires in 24 hours but your
CDN caches for 1 hour, the CDN might re-fetch outdated content from page cache before page cache
expires. Align TTLs across layers or use proper purge coordination.
Over-caching dynamic content breaks functionality. If a form submission page gets cached, users might
see stale CSRF tokens and form submissions fail. Cart pages getting cached show incorrect contents.
Ensure exclusions are configured correctly at every layer for dynamic content.
Configuration Best Practices
Based on years of configuring caching across different WordPress environments, here’s what I
recommend as baseline configuration.
Static Assets Strategy
Use long browser cache TTLs (1 year) for CSS, JavaScript, images, and fonts. Ensure your build
process or WordPress theme uses versioned filenames or query strings so new versions get new URLs.
Configure your CDN to match or exceed these TTLs. This maximizes cache hit rates for returning
visitors while ensuring updates are seen immediately.
HTML/Page Strategy
Use minimal browser caching for HTML (no-cache or very short TTL). Enable page caching with 12-24
hour TTL for article content—news sites might use shorter, stable content sites might use longer.
Configure automatic purging on content updates so published changes reflect immediately. If using
CDN edge caching for HTML, ensure purge integration works correctly.
Cache Exclusions
Exclude logged-in users from page cache by default. Most caching systems do this automatically.
Exclude cart, checkout, and account pages on e-commerce sites. Exclude pages with forms if CSRF
token issues occur. Exclude search results pages. Test critical user flows (adding to cart, checking
out, logging in, submitting forms) with caching active to verify exclusions work.
Object Cache Deployment
If your hosting supports Redis or Memcached, enable it. The setup is usually straightforward and
benefits are significant for logged-in user experiences and admin performance. Monitor memory
usage—object cache stores can fill up if not configured with appropriate eviction policies. Most
WordPress object cache plugins handle this correctly by default.
Troubleshooting Cache Issues
When caching causes problems, systematic troubleshooting identifies which layer is at fault.
Identifying Which Cache Is Serving
Check response headers using browser developer tools (Network tab). Headers reveal cache status:
X-Cache or CF-Cache-Status indicate CDN cache hits/misses, custom headers from your caching plugin
indicate page cache status, and Cache-Control shows browser caching configuration.
Testing in incognito mode eliminates browser cache from the equation. If you see old content in
incognito, it’s not browser cache—it’s server-side or CDN cache.
Adding cache-busting query strings (yoursite.com/page/?nocache=123) might bypass some caches, helping
isolate which layer has stale content.
Systematic Purging
When content doesn’t update, purge systematically from inside out. First, purge your page cache
(through admin interface or CLI). Then purge CDN cache (through CDN dashboard or API). Finally,
clear browser cache and test in incognito.
If systematic purging doesn’t resolve the issue, verify that automatic purging is configured and
functioning. Check that your caching plugin’s CDN integration is working. Look for secondary caches
you might have forgotten about (hosting provider cache, reverse proxy cache, etc.).
Performance Testing
Verify caching is actually working by measuring response times. Cached pages should respond in under
100ms from your server. If tool measurements show slow responses, caching might not be active or
working correctly.
Check cache hit rates in your CDN dashboard and caching plugin statistics. Low hit rates suggest
exclusions are too broad, TTLs too short, or traffic patterns are unusual. High hit rates confirm
caching is working effectively.
Conclusion
Effective WordPress caching requires understanding and configuring multiple layers. Browser caching
prevents unnecessary network requests for returning visitors. CDN caching moves content closer to
visitors geographically. Page caching eliminates WordPress processing for most requests. Object
caching speeds up WordPress when it does need to run.
Each layer serves a distinct purpose, and together they compound to provide dramatic performance
improvements. A well-cached WordPress site can serve pages 10-100 times faster than an uncached site
while handling far more concurrent visitors.
The key is proper configuration at each layer with coordinated cache invalidation. Long cache times
for static assets that never change, shorter times for content that updates, and automatic purging
when changes occur. Exclude content that shouldn’t be cached, test that exclusions work, and monitor
cache hit rates to verify effectiveness.
With this understanding, you can configure caching deliberately rather than just installing a plugin
and hoping for the best. You can troubleshoot when things go wrong by identifying which layer has
stale content. And you can optimize confidently, knowing how each layer contributes to overall
performance.
admin
Tech enthusiast and content creator.