I learned the importance of staging environments the hard way. A routine plugin update on a client’s
ecommerce site triggered a fatal PHP error that took down the entire store during Black Friday
weekend. The backup existed, but restoring it took four hours—four hours of lost sales during the
busiest shopping period of the year. That incident fundamentally changed how I approach WordPress
updates.
Every WordPress update carries risk. Plugin conflicts, theme incompatibilities, PHP version issues,
and database migration failures can transform a simple update into a site-breaking disaster. Yet I
still see publishers clicking “Update All” on their production sites without backups, staging tests,
or rollback plans.
This guide establishes the professional update workflow I now follow religiously. You’ll learn to
implement automated backups that actually work when you need them, create staging environments for
safe testing, and follow a process that catches problems before they affect visitors. The goal isn’t
just protecting against disasters—it’s gaining confidence to keep your site current without anxiety.
Understanding What Goes Wrong
Before building defenses, understand the specific threats you’re defending against. Update failures
fall into distinct categories, each requiring different prevention and response strategies.
Plugin Conflict Failures
Plugin conflicts are the most common update failure. Two plugins that worked independently stop
working together after one updates. The updated plugin might change how it hooks into WordPress,
conflicting with another plugin’s hooks. Or it might require a newer PHP feature that breaks
compatibility with an older plugin.
Symptoms vary from white screens of death (fatal PHP errors) to subtle functionality breaks where
forms stop submitting or specific features malfunction. The challenge is that these conflicts are
unpredictable—plugin developers can’t test against every possible combination of other plugins.
Theme Compatibility Breaks
Themes depend on WordPress core functions and plugin integrations. When WordPress core updates,
themes that relied on deprecated functions or internal APIs may break. Similarly, themes designed
for specific plugin versions can malfunction when those plugins update.
Theme breaks often present as visual issues—layouts collapse, styles disappear, or elements render
incorrectly. These are usually less catastrophic than plugin conflicts but can make sites
unpresentable.
Database Migration Failures
Major plugin updates sometimes restructure their database tables. If this migration fails partway
through—due to timeout, memory limits, or existing data inconsistencies—tables end up in corrupted
states. The plugin can’t read its old format, and the new format is incomplete.
Database failures are particularly scary because they can cause data loss. Content stored in plugin
tables may become inaccessible, and fixing corrupt tables requires database expertise.
PHP Version Incompatibilities
Plugin updates sometimes require newer PHP versions than your server runs. Or they might use syntax
compatible with newer PHP that breaks on older versions. Conversely, some older plugins break when
hosts upgrade to newer PHP versions.
PHP incompatibilities typically cause immediate fatal errors—the site won’t load at all until the
incompatible code is removed or PHP version changes.
Why Backups Alone Aren’t Enough
Many site owners think “I have backups, so I’m protected.” Backups are essential, but they’re
recovery tools, not prevention tools. Understanding their limitations reveals why additional
protection matters.
Downtime During Restoration
Restoring from backup takes time. Depending on site size and hosting performance, full restoration
might take 30 minutes to several hours. During that entire period, your site is either broken or
offline. For any site generating revenue or serving important audiences, that downtime has real
cost.
Data Loss Between Backup and Failure
If you run daily backups and don’t notice a problem for two days, your latest backup already contains
the broken state. Recovering requires going back further, losing legitimate changes made between the
good backup and the failure.
For sites with active content—new posts, user signups, ecommerce orders—this data loss can be
significant. You might restore functionality but lose recent content.
Backup Verification Gaps
Backups that haven’t been tested might not work when needed. Corrupt backup files, incomplete
captures, or restoration procedures that don’t work under pressure are distressingly common. Many
site owners discover their backup system failed only during an actual emergency.
No Prevention Value
Backups help you recover after problems. They do nothing to prevent problems from occurring. A
complete protection strategy needs both backup (recovery) and staging (prevention).
Implementing Reliable Backups
Despite their limitations as the sole protection, reliable backups remain foundational. When
prevention fails, backups are your last resort.
What to Back Up
A complete WordPress backup includes several components. Missing any one can make restoration
incomplete or impossible.
The database contains your content, settings, user accounts, and plugin configurations. It’s
typically the smallest component by file size but often the most critical—content can’t be
recreated.
The wp-content folder contains themes, plugins, and uploaded media. This is usually the largest
component, especially for media-heavy sites. Themes and plugins can be reinstalled, but custom
modifications and all media files must be backed up.
Configuration files (wp-config.php, .htaccess, Nginx configs) contain settings that are easy to
forget but essential for site function. salts, database credentials, and special configurations live
here.
WordPress core files are technically reinstallable, but including them speeds restoration. You don’t
want to debug whether an issue is core-related when restoring under pressure.
Backup Schedule Strategy
The right backup frequency depends on how often your site changes and how much data loss you can
tolerate.
Database backups should run daily at minimum. The database contains your content, and content changes
frequently on active sites. For high-volume publishers or ecommerce sites, consider every 6-12
hours. Database backups are small and fast.
Full file backups can run weekly for most sites. After initial upload, media files don’t change.
Weekly captures new uploads adequately. Some backup plugins offer incremental file backups—only
changed files—which can run more frequently without storage explosion.
Pre-update backups should be manual and immediate. Before any update session, create a fresh backup
regardless of automated schedule. This ensures you have a restore point from moments before changes.
Off-Site Storage Requirements
Backups stored only on your web server create a single point of failure. Server hardware failures,
hosting account suspensions, or successful attacks can destroy both your site and local backups
simultaneously.
Cloud storage destinations like Google Drive, Dropbox, Amazon S3, or Backblaze B2 provide geographic
separation. Even if your entire server is compromised, backups remain safe and accessible.
For critical sites, use multiple destinations. Cloud providers occasionally have outages—even major
ones. Sending backups to two independent services (say, Google Drive and S3) provides redundancy not
just against server failures but against cloud provider issues.
Testing Backup Integrity
A backup that can’t be restored is worthless. Periodically test that your backups actually work.
Monthly, download a full backup package and verify file integrity. Can you open the zip/tar file? Are
all expected files present? Is the database dump valid SQL?
Quarterly, do a full test restoration to a test environment. Restore both files and database to a
staging server or local development environment. Verify the restored site actually works—pages load,
admin access works, critical features function.
This testing habit catches backup problems before you need the backups. Discovering during your
quarterly test that database dumps have been incomplete for two months is far better than
discovering it during an actual emergency.
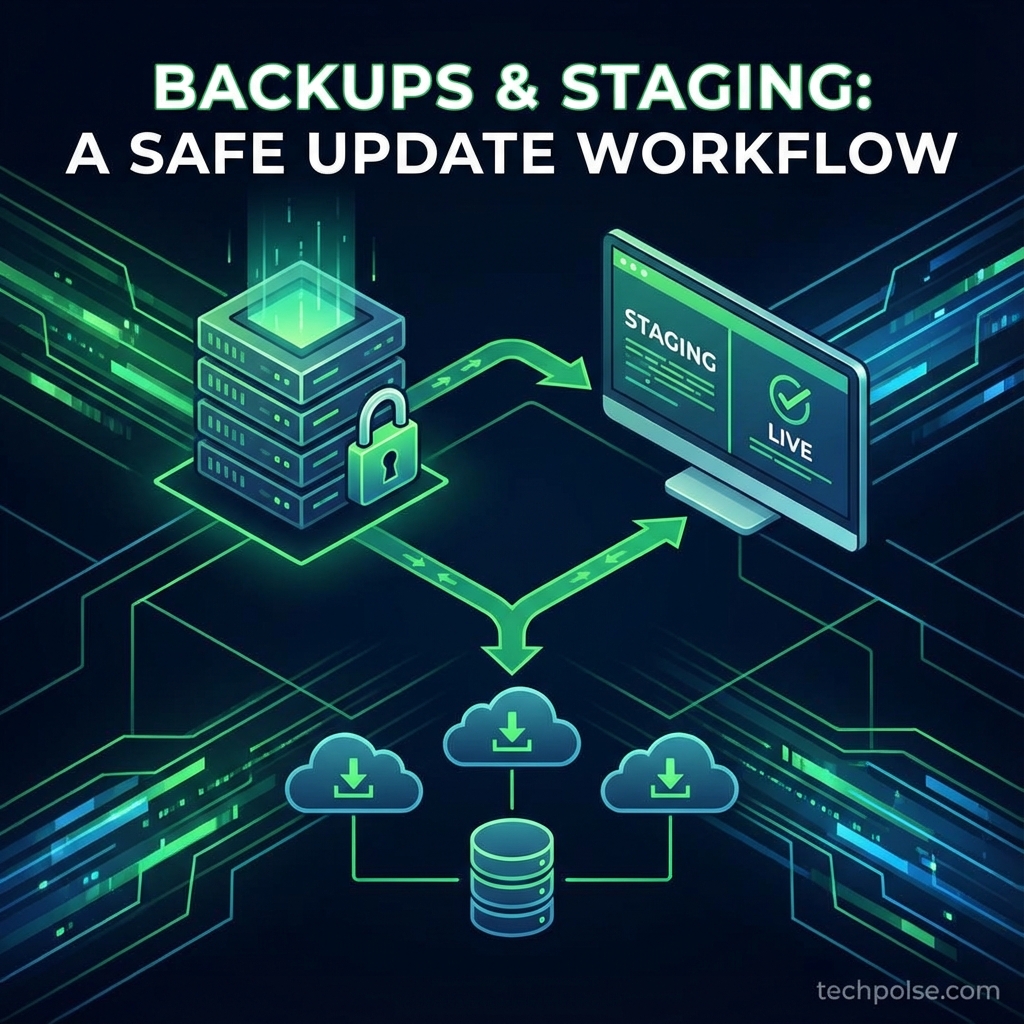
Building Your Staging Environment
Staging environments are where updates get tested before touching production. They’re complete copies
of your site where problems can be discovered and resolved without affecting visitors.
Staging Environment Options
Host-provided staging is the easiest solution when available. Managed WordPress hosts like WP Engine,
Kinsta, and Flywheel include one-click staging creation. You click a button, wait a few minutes, and
have a complete copy of your site on a staging URL. Pushing staging changes to production is equally
simple.
Plugin-based staging works on any hosting. WP Staging and similar plugins create staging copies
within your existing hosting environment. The staging copy uses a separate database and runs in a
subdirectory. It’s not as seamless as host-provided staging but works anywhere.
Manual subdomain staging involves creating a subdomain (staging.yoursite.com), setting up a WordPress
installation, and migrating your production site there. This requires more technical work but offers
maximum control and works on any hosting.
Local development environments run WordPress on your computer using tools like LocalWP, DDEV, or
Docker-based solutions. Great for development work but requires syncing content from production and
doesn’t perfectly replicate your server environment.
Essential Staging Configuration
Staging sites need specific settings to prevent interference with production and the outside world.
Block search engines absolutely. Enable WordPress’s “Discourage search engines” setting. Add noindex
meta tags. Use robots.txt to block all crawlers. Google indexing your staging site creates duplicate
content problems and exposes potentially unstable code to searchers.
Disable production-specific services. Turn off caching plugins—you want to see changes immediately,
not cached versions. Disable CDN integration if you use one. Disable analytics tracking—you don’t
want staging traffic polluting your data.
Trap outgoing emails. Staging sites should never send real emails. If you’re testing contact forms,
order confirmations, or notification systems, you don’t want staging tests reaching actual
customers. Use plugins like WP Mail Logging to capture emails locally, or configure a test SMTP
service that doesn’t deliver externally.
Separate databases entirely. Staging must use its own database, never share with production. This
seems obvious but some migration tools can accidentally connect staging to production databases with
catastrophic results.
Restrict access. Password-protect the staging site or restrict by IP address. Staging often has debug
information enabled and may be in unstable states. Don’t let random visitors encounter it.
Keeping Staging Current
Staging environments drift from production as you add content. An outdated staging environment
provides less accurate testing—issues that appear with current content might not appear with
month-old staging content.
Refresh staging from production regularly—at least monthly, or before any significant update session.
The refresh should copy both the database (content, settings) and wp-content (themes, plugins, media
or at least placeholders).
Be aware that refreshing overwrites staging changes. If you’re mid-way through testing something on
staging, refreshing loses that work. Plan refreshes during natural breaks in testing.
The Complete Update Workflow
With backups and staging in place, follow this systematic process for every update session.
Phase 1: Preparation
Check available updates on production. Note exactly which plugins, themes, and core versions are
pending. Write this down—you’ll apply the same updates to staging and need to track what changes.
Review changelogs for major updates. Plugin developers document breaking changes, new requirements,
and deprecated features in changelogs. A plugin moving from version 2.x to 3.x likely has
significant changes worth understanding. Minor version updates (2.5.3 to 2.5.4) typically need less
scrutiny.
Assess staging freshness. If staging was last refreshed weeks ago with significantly different
content or configuration, refresh it from production before testing.
Create a fresh production backup immediately before the update session begins. Not yesterday’s
automated backup—right now. This is your guaranteed restore point if everything goes wrong.
Phase 2: Staging Testing
Apply updates to staging first, one at a time rather than bulk updating. This isolation helps
identify which specific update caused any problems discovered.
After each update, test core functionality: Does the homepage load? Do navigation links work? Does a
single post page render correctly? Can you access wp-admin?
Test specific features related to the updated plugin. If you updated a form plugin, submit a test
form. If you updated WooCommerce, walk through checkout. If you updated your SEO plugin, verify meta
tags still appear.
Check the browser console for JavaScript errors. Many functionality issues present as JavaScript
failures. The console quickly reveals problems that visual inspection might miss.
Verify performance hasn’t degraded. Run a basic speed test or just subjectively assess—does the site
feel noticeably slower after updates? Performance regressions can be legitimate reasons to delay or
rollback updates.
If any update causes problems on staging, stop. Research the specific issue. Determine if it’s a
known problem with a known fix, a conflict you can resolve, or something requiring the update to
wait. The whole point of staging is catching problems here, not on production.
Phase 3: Production Deployment
Verify your pre-session backup completed successfully. Confirm the backup file exists, has a
reasonable size, and is stored off-site. Don’t proceed without confirmed recovery capability.
Choose an appropriate time for production updates. Early morning or late evening typically has lower
traffic. Avoid updates right before important events, launches, or high-traffic periods. If you run
an ecommerce site, don’t update Friday afternoon—you might not notice problems until Monday while
customers abandon during the weekend.
Apply the same updates in the same order you tested on staging. Don’t vary from what you tested—that
adds untested variables.
Immediately after updates complete, verify production works. Load the homepage, test critical
features, check admin access. Don’t walk away assuming everything worked because staging was fine.
Monitor for the next 24-48 hours. Some issues only appear under real traffic conditions or specific
user actions you didn’t test. Keep an eye on error logs and user feedback.
Handling Failures
Despite testing, production updates occasionally fail. Having practiced response procedures minimizes
downtime and damage.
Immediate Response
Stay calm. Panic leads to additional mistakes that compound the original problem. Methodical response
is faster than frantic troubleshooting.
Document what you see. Screenshot error messages. Note exactly which updates you just applied. This
information helps diagnosis and helps others help you if needed.
If the site is completely down, enable WordPress debug mode by editing wp-config.php via FTP to set
WP_DEBUG to true. This often reveals the specific error and which file caused it.
If you can identify the problem plugin, disable it by renaming its folder via FTP. Renaming the
folder from “problem-plugin” to “problem-plugin-disabled” immediately deactivates it without needing
wp-admin access.
Rollback Procedures
For simple plugin rollback, download the previous version from WordPress.org’s plugin SVN (accessible
via the Advanced View on plugin pages) and replace the updated plugin via FTP.
For database-related failures where a migration corrupted data, restore just the database from your
pre-update backup while keeping current files.
For severe failures affecting multiple things, do a full restore of both files and database from the
pre-update backup. This is the nuclear option but guarantees return to a known-good state.
After any rollback, verify the site works correctly before considering the incident resolved. Check
all the same things you’d check after updates.
Post-Incident Analysis
After recovering, understand what went wrong. Why did the update fail? Why didn’t staging catch it?
How can you prevent similar issues?
If staging missed the issue, consider whether your staging environment accurately mirrors production.
Differences in PHP version, enabled extensions, or server configuration can cause “works on staging,
breaks on production” scenarios.
Document the incident for future reference. What update caused the problem? What were the symptoms?
What was the resolution? This record helps if similar issues occur later.
Maintenance Schedule
Rather than random updates whenever you notice them, establish a structured maintenance schedule.
Weekly Review
Every week, check available updates. Assess priority—security updates are urgent and should not wait;
feature updates can be batched. Decide whether to apply updates this week or defer to monthly
maintenance.
Monthly Update Window
Designate a monthly window for non-urgent updates. Perhaps the first Tuesday of each month. Batching
updates reduces the overhead of multiple staging test cycles while keeping the site reasonably
current.
Quarterly Deep Review
Every quarter, audit your plugins. Which ones do you actually use? Remove plugins you no longer
need—they’re maintenance burden and attack surface without benefit. Review plugin alternatives if
anything is abandoned or problematic.
Security Exception
Security updates bypass the normal schedule. When WordPress emails about security releases, or
plugins have security patches, don’t wait for the monthly window. Test minimally on staging and
deploy quickly. The risk of known vulnerabilities exceeds the risk of expedited updates.
Conclusion
A professional update workflow transforms WordPress maintenance from gambling into controlled
process. Automated backups with off-site storage provide recovery foundation. Staging environments
enable safe testing before production changes. A consistent process catches problems during testing
rather than in production emergencies.
The initial setup takes real time—configuring backup automation, creating staging environments,
establishing processes. But that investment pays dividends every update session. No more anxiety
about clicking Update. No more frantic recovery from avoidable disasters. Just confident, systematic
maintenance that keeps WordPress current and secure.
The update that would have cost four hours of Black Friday downtime now gets caught on staging where
it can’t hurt anything. That peace of mind is worth the setup investment.
admin
Tech enthusiast and content creator.